- Create
How to make your own sparklers
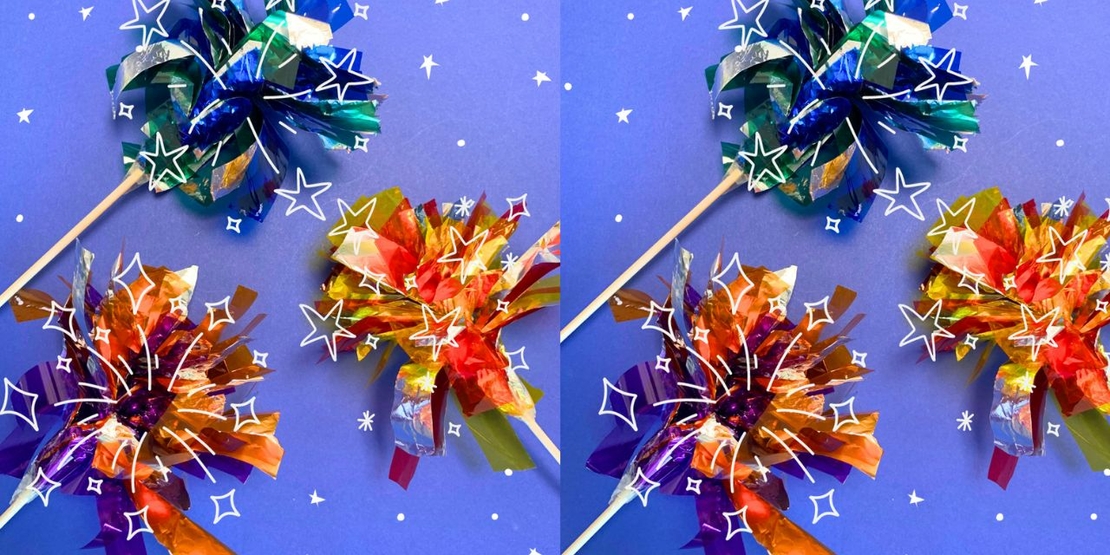
Sparklers are often used at celebrations such as weddings, birthdays, New Year's parties or Bonfire Night. However, traditional sparklers involve a burning flame that isn't suitable for all ages. To ensure fun for all the family, make your own sparklers with our step-by-step guide.
Using only a handful of everyday craft and household items, you can easily transform sheets of tinfoil and coloured cellophane into a dazzling DIY sparkler for even the youngest of children to enjoy.
Follow the tutorial and create your own showstopping craft sparkler today!
Tutorial overview
What you will need
- A4 cellophane sheets in your chosen colour (2 per sparkler)
- Tin foil
- Wooden dowels (1 per sparkler)
- Scissors
- Sticky Tape
Optional
Category
Important
Steps 1 and 4 require scissors. Please ensure children are supervised when using scissors. If necessary, an adult should complete the cutting on behalf of a child.
Step 1: Cut your tin foil to size
To make your own sparkler, you'll first need to choose two sheets of cellophane in your desired colours.
Then, carefully using scissors, cut a sheet of tin foil to A4 size.
Step 2: Layer the sheets of tin foil and cellophane
Once the sheet of tin foil is cut to size, place it between the two sheets of cellophane.
Step 3: Fold the sheets lengthways
Fold the three layers lengthways a little under halfway, so that it creates a small gap as shown by the red on the right hand side.
Step 4: Cut strips in the folded sheets
Carefully cut strips along the open edge towards the fold, ensuring not to cut through to the fold.
Step 5: Stick the dowel in place
Once the strips are cut, stick the wooden dowel to one side using Sticky Tape.
Tacky's tip
If you haven't got any Sticky Tape, you could use PVA white Glu instead.
If using PVA glue, continue through the guide until step 7, then make sure you allow time for the glue to fully dry before use.
Step 6: Wrap the sheets around the dowel
Wrap the tin foil and cellophane sheets around themselves as if you've rolled them around the dowel.
Use Sticky Tape to occasionally fix the sheets in place to make sure it is fully secure.
Step 7: Open the layers to create the sparkler shape
Once fully wrapped, stick in place with Sticky Tape and gently open the layers to form your DIY sparkler.
Step 8: Ta-da! You now have a craft sparkler
There you have it - you now know how to make your own sparkler, which is safe to use and has added sound effects!
Related products
SEE ALL PRODUCTSRelated tutorials
3 simple things to make with lolly sticks
Discover our simple things to make with lolly sticks including a DIY bookmark, a DIY dragonfly from wooden craft pegs & a DIY magnet from coloured lolly sticks
4 super easy children's craft ideas to do at home
Explore 4 easy craft ideas for your children to do at home. From handmade greetings cards, to decorating cardboard boxes, to photo frame crafts & DIY window crafts
BE INSPIRED BY OUR GLITTER GLUE CRAFT IDEAS
Glitter glue is the perfect way to add something special to art and craft projects, without the mess and hassle of regular glitter. Check out our six simple ideas to bring a little sparkle to your…
EASY LION CRAFT ACTIVITY WITH COUNTING PRACTICE FOR KIDS
Discover our step-by-step guide for how to recreate this lion mane craft activity from Creative Mama Che and get ready to start counting, 1, 2, 3…!
How to build your own DIY cardboard dollhouse
Discover how to create a DIY cardboard dollhouse with Bostik clear sticky tape, extra strong glu dots and glitter glue pens. Make your own dollhouse today!
HOW TO CREATE A PAPER EASTER BASKET
Easter weekend is the perfect time to hop over to the craft table, and we've made entertaining the little ones even easier with this Easter craft tutorial. Follow our super simple, step-by-step…
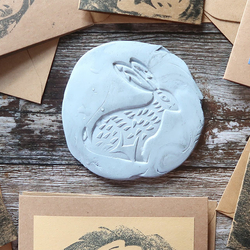
HOW TO CREATE REVERSE PRINTS USING BLU TACK®
Make gorgeous reverse prints using Blu Tack® - perfect for greeting cards and other home décor

